This article was originally published on February 11, 2019.
If you want to check a material or component for wear and tear, a visual inspection is generally a good place to start. But even if you have high-resolution instruments capable of seeing tiny surface defects, you might still be missing a big part of the picture, says Jie Shen, a professor of computer and information science at UM-Dearborn and fellow at the Institution of Engineering and Technology. That’s because many weaknesses are often hiding deep within an object — meaning, you can’t see them unless you can somehow see inside it.
But how exactly would you do that? Generally, Shen said the approach for material scientists has been to slice into things and inspect the cross section. But that has a couple disadvantages. If you’re working with something you’d simply like to assess the condition of, your autopsy will likely destroy the object in the process.
Even then, you’re still only getting a snapshot of what the inside of the material looks like in that particular area. The real trick, Shen said, is to map every little bit of the object’s interior and exterior, in high resolution, without somehow cutting it into lots of tiny pieces.
Shen is working on a process that could help scientists and engineers do just that. First, he scans an object with what are called non-contact sensors. Most often, he uses a super high-resolution CT scanner (similar to those found in hospitals), which uses X-rays to produce an image of something inside and out. (For surface defects, you can also use lasers.) Then, Shen’s software renders a clear digital 3D replica of the object, which can be thoroughly analyzed for defects and hidden weaknesses.
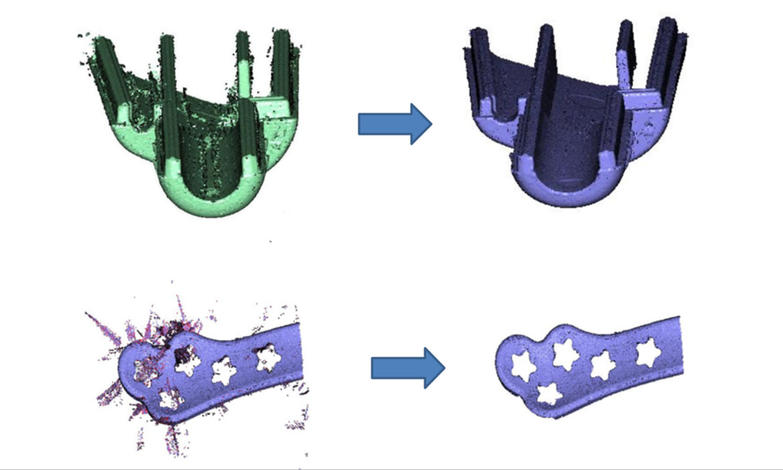
Sounds straightforward enough. But one of the tricky parts of using certain kinds of scanning technologies, like lasers, is that they can create “noisy” images.
“In some cases, the optical properties of the material won’t cooperate with the scanner,” Shen explained. “If you have a material with a very reflective surface, for example, the laser light can hit the surface, the light can scatter, and that scattering causes distortion in the visual data.”
In fact, Shen said a similar phenomenon can happen with rough objects. So he came up with a solution: His newest algorithms automate the process of removing noise from the scanned data. It’s somewhat similar to how audio engineers apply one-click computer filters to clean up clicks and pops on old recordings to make them sound clearer.

There are a number of possible applications for the new process. For example, Shen said turbine blades in jet engines are routinely discarded after a defined period of time. It’s done as a precaution because failure of a component like this, in flight, could be catastrophic. But by doing scans of these types of objects, aerospace engineers would have a much more precise way of assessing the strength and lifespan of particular components — thus boosting aircraft safety. This kind of application would be particularly useful, Shen said, when you’re working with an object whose previous use history is unknown.
One of Shen’s other big ideas: Using these imaging and modeling techniques to create new synthetic materials — in many cases, by reverse engineering natural materials.
“For example, bamboo or coconut shell — those are lightweight but they’re also very strong,” Shen said. “Those fibers that make up the interior of those materials are not completely uniform, but there is some pattern, and that’s where their strength lies. So if we can figure out what the pattern is, and model it, you could potentially use that as the basis for new materials.”
Shen said advanced, yet-to-be-developed versions of 3D printing could be the partner technology that allows that to happen. Then, his digital models could serve as recipes to print lightweight, super-strong materials that are precisely engineered from the inside out.


